There are no items in your cart
Add More
Add More
| Item Details | Price | ||
|---|---|---|---|

The advancements in Virtual Reality(VR) has marked a new era with the introduction of meta-verse by Meta. We have seen new devices that helps with VR interactions to bring about an ultimate immersive feel. Along with object interactions in VR, Locomotion is also an important element. It is one of the issues faced by VR game/application developers because of the lack of space available for the user. This induces a problem of character movement within the application. In this write-up, we’ll work through some of the basic ways to perform locomotion in a VR application. We would be working for applications for Oculus Headset. Thus it is expected that you are aware of oculus integration with Unity.
The Oculus controllers consist of joysticks, one on each controller. In this method of linear movement, we make use of these joysticks. After integrating the Oculus-Integration package from the Unity Asset Store, we would be able to import the controller prefabs to our game scene.

Import Oculus Integration package after adding it you your Assets from the Asset Store.
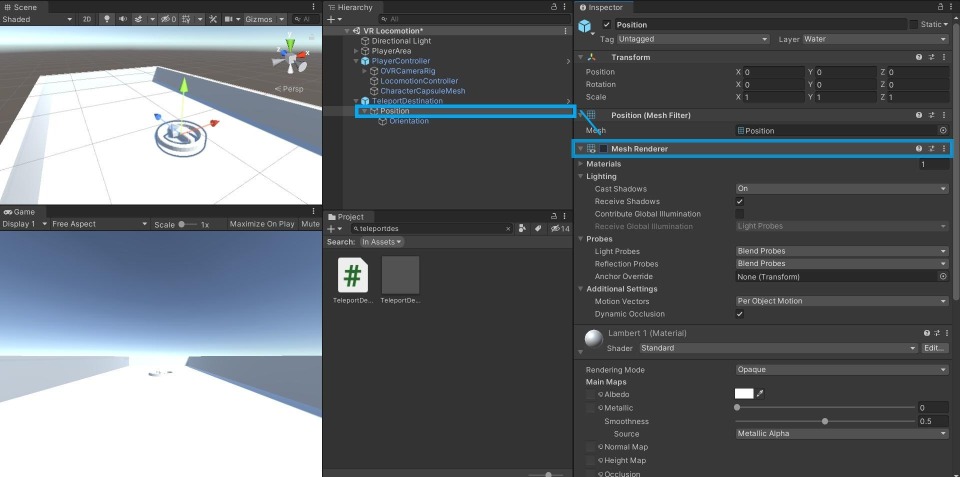
Now we need to add OVRPlayerController Prefab into our Scene. Create a small area for the player to move around. You can do this using the basic 3D objects or Plane. Search for OVRPlayerController in the Project window.
Type OVRPlayerController in the search bar. Drag and drop the OVRPlayerController prefab into the game scene onto the area of play.
After adding it to our scene, adjust the position according to your choice or as shown below.

To implement linear movement, this is enough. Now what we can do is change the settings in the prefab according to your gameplay. You can change the speed of the movement, angle of rotation, smoothness of rotation, etc. The settings if above mentioned can be found in the inspector window after selecting the OVRPlayerController Prefab. The inspector window is given below:-

All the settings given is self-explanatory. Try altering it and see the dissimilarity.
Connect your VR Headset and controllers and run the game, either by building or using Oculus Link with which the editor can directly run the game by connecting it with USB cable.
Linear movement can be achieved by this method easily.
One other way of locomotion in VR that can be easily implemented and used commonly is teleportation.
Teleportation is the method of locomotion in which the player is stationary at first and then on button press, a ray is displayed, where one end of the ray curves and points to the ground, that shows to which point the player can move if the button is released.
Teleportation is the most commonly used technique because it is easier for the player to move and less strain on keeping track of their orientation.
Steps to implement teleportation are given below:-
For teleportation, we use a different prefab instead of the one used for linear movement. This is because the current prefab is much more defined to make the implementation easier. The child game objects required for teleportation is already added and the component scripts are also mostly set. All we need to do is some alterations to make it work properly.
In a new scene, search for “PlayerController” in the project window and add it to the game scene.

Type “PlayerController” in the search bar of the Project window. Drag and drop it to the scene.
We can see that there is one more child object in this prefab than the previous prefab we used. “Locomotion Controller” helps the player to have teleportation capabilities.

Now we need to make sure the following scripts are added as components of LocomotionController. It would have these components already. Make sure the following scripts are enabled and the other ones are disabled. You can try experimenting on your own with all the script components after.

These fields would be filled automatically, if not you can add them on your own. Drag and Drop the objects from the Hierarchy to add them on your own.

The above options can be checked or unchecked according to your gameplay. In the above settings, players can only move through teleportation and also can’t rotate themselves using the joystick.

The Aim Button is changed to R Index Trigger. The Teleport Button is R Index Trigger by default. This means that when the Right Index button or the trigger button the right-hand controller is pressed, the teleportation arc is visible and aiming is possible. When it is released, player teleport to that location.

This component is given in case you want a straight Laser to show the destination. We can change it later.

Components to display the Line Renderer of the Laser.

The thumbstick value is changed to R touch.

Aim Button and Teleport Button is changed to R Index Trigger.
Input mode is changed to “Separate Buttons for Aim and Teleport”. You can try using other methods also.
Aiming Controller is changed to Touch.
Capacitive Aim and Teleport Button is Right Trigger.
Now that’s all the components that need to enable in the “LocomotionController” Object. The rest should be disabled and make sure that the variable fields are not empty. Let’s try running the game with these settings.

We can see that the destination arrow doesn’t have any color. The laser is straight and doesn’t look very pleasing. We need to change some settings to make it look better.
Also, there’s an issue of the transition to the next destination.
Let’s take a look at all the changes to be done.

From the Menu bar, go to Edit => Project Settings. In the Time tab from the left. Change the Fixed Timestep to 1/90. This will make Unity check for Physics each frame so that we don’t fall so easily from outside the Play area.
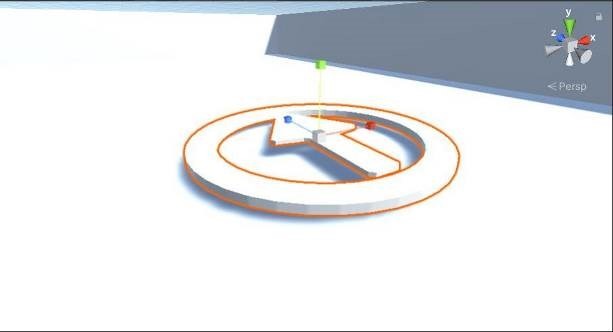
Now let’s change the arrow showing the teleport destination.

Search for “TeleportDestination” prefab from the Project window search bar. Drag and drop the prefab to our scene.

Let’s disable the outer circle first. Unchecked the Mesh Renderer of the Position object.
Re-scale the inner circle using the Scale tool from the Tools Menu. Reduce the Y-axis scale to decrease the height of the circle.

To add colors to the arrow, let’s change the material option. Select the drop-down button, go to Unlit and then select Color.

Change the Main Color to your choice.
Let’s add a glow effect to the inner circle.

Add a Cylinder as the child object of Position.
Position the cylinder as shown to the left. Then create a material for the cylinder.
Name the material as Glow and in its Inspector window, change the shader settings to Custom/CustomGlow and select ColumnGlow.


Change the settings of the shader as given to the left to make the cylinder as shown.
Remove the Capsule Collider of the Cylinder.

Now, select the TeleportationDestination prefab from the Hierarchy and click the Overrides drop-down. Click Apply All to apply the changes to prefab source. After that you can delete the TeleportDestination object from the Hierarchy.
Since the Laser is in a straight line, we need to change it to a curve. For that, we need to remove some components and add another. In the PlayerController object Inspector window, we need to change some script components.
You can either remove the “Teleport Aim Handler Laser” Component. Or just uncheck the box to disable that component. Then enable the “Teleport Aim Handler Parabolic” component by checking it. This would make the Laser in a parabolic shape.


Now the teleportation is ready. Let’s try and Run the game.

The laser has a parabolic shape and the teleport destination arrow has a glow effect. Pressing the right-hand trigger button would enable the laser and destination arrow and releasing the button triggered the teleportation.
1. WalkAbout
Developed by Tekton Games. In this method, you have to walk in real for the character to move and when you reach the boundary of your play space then you hold a button on your controller, and the VR world freezes. Now you can turn around and then release the button to further walk from where you left off. In that way, you can stay inside the play space and actually walk throughout the game.
2. RIPmotion
Developed by Ryan Sullivan. The way this works is you have to hold one controller out in front of you and hold the grip button on the other controller and run in place. You actually have to run on the spot where you are standing and turning your body would then turn the character in the game. This would help decrease VR motion sickness.
3. VR Walking Prototype
Developed by David Dewhirst. How this works is that you have to move your arms just like how you do when you are walking. You should hold the grip buttons and then swing your arms like how you walk which in turn makes the character move forward in the direction you are facing.
{{AUTHOR}}
 Launch your Graphy